NZXT H2: Not Quite Quiet
by Dustin Sklavos on May 26, 2011 2:43 AM EST- Posted in
- Cases/Cooling/PSUs
- mid-tower
- NZXT
Assembling the NZXT H2
Starting with the motherboard, I was a little disappointed not to find stand-offs already in place. I've seen a couple of manufacturers build them right into the tray (which is frankly ideal), and at a point in the industry where pretty much everyone has standardized on mounting hole placement in motherboards this would've been nice. On the flipside, though, NZXT includes a socket with a phillips head that makes installing the stand-offs substantially easier. Getting the I/O shield and motherboard in was fairly painless, though I do wish NZXT had made the heatsink cutout in the motherboard tray a little wider: if you visit the gallery you'll see the backplate for our heatsink is slightly covered up.


There are two steps in computer assembly that I hate more than anything else: connecting the case headers to the motherboard, and routing the 12V AUX cable (which we'll get into in a bit). The headers for the buttons and LEDs are already irritatingly small and standardized in the most consumer-unfriendly way, but NZXT inexplicably opts not to use the traditional color-coding. The cables in the headers are black, and black with white stripes. My mental shortcut has always been "the color is the positive, the white is the ground". I looked at these cables and was instantly confused, and thus reacted in the same fashion most other white guys do in that situation: anger and fear. If the power LED hadn't been split into two separate headers with a "+" and "-" on them I would've had no idea at all how NZXT had color-coded these. It's completely unnecessary, as the case lacks a window so no one will see if your case headers are a matching black or not.
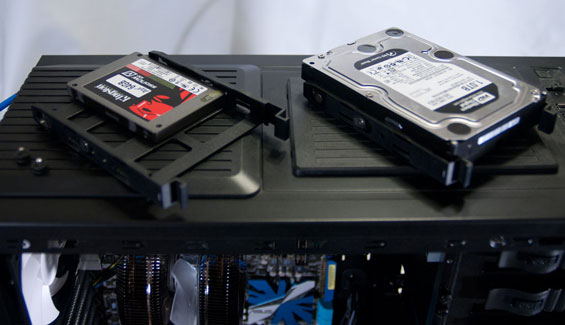
Installing the drives took a little bit of work, but nothing unreasonable or unusual. Removing the covers for the 5.25" bays is a breeze, but note that they aren't entirely toolless: while the main side has plastic studs that snap in and lock the drive into place, the other side isn't secured at all, so you'll probably want to use thumbscrews to keep it from wobbling. The 3.5" drive trays can be a little fussy since you have to basically flex them to snap the studs into the drive's mounting holes, but I found it fairly easy to jimmy the drive in and out of the tray with a small flathead screwdriver. The trays also have mounting holes in the bottom for 2.5" drives, but you'll need to screw those in manually, which is par for the course for almost any enclosure.
![]()
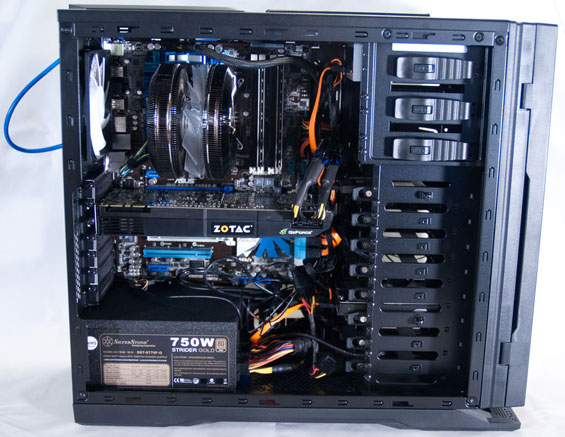
When you install expansion cards, you're going to note that there are some potential clearance issues. Our GeForce GTX 580 butted up against the cables connecting our SSD; we were able to get everything in, but it was a tight fit. If you use a longer card you're going to have to sacrifice a couple of drive bays to get it. Since NZXT offers you a staggering eight that shouldn't be a serious problem, but it's something to keep in mind. Likewise, because of this clearance trouble, side-mounted SATA ports on motherboards are going to be somewhat cramped.
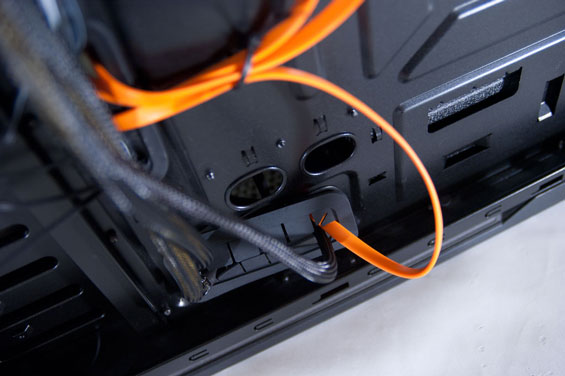
Finally, installing the power supply and wiring the insides resulted in a couple of nagging issues. I had a little trouble lining up the power supply correctly, but that's not a big deal. This is where I discovered that the rubber linings for the mounting holes in the motherboard tray aren't actually secured to it in any way. Routing the main power cable to the motherboard inevitably requires using at least a little force, and routing all of these cables through the rubber lining actually caused the rubber lining to come off. Thankfully the holes themselves are rounded off so they aren't going to start cutting the cables (or you), but a little glue here would've been appreciated.
And of course, getting the auxiliary 12V cable plugged into the motherboard has alwats been an exercise in bloodletting. I love Zalman's CPU coolers and have been a big fan for years, but I've tended to colloquially refer to having to "make sacrifices to Zalman the Blood God." This is because whenever I've had to work in a case with low clearance (like the H2), I've inevitably carved up my hands on Zalman's heatsinks like a moron while trying to install the auxiliary 12V cable. Clearance between the top of the motherboard and the top of the case appears to be particularly low in the H2, and I'm not sure how end users are supposed to do this with any kind of ease with a 140mm fan installed.
Ultimately the assembly went fairly well, though. Most users may want to simply remove the rubber linings from the motherboard tray altogether, and I can't stress enough how much easier a modular power supply can make your life; that's just true of any build in any case.


19 Comments
View All Comments
Dustin Sklavos - Thursday, May 26, 2011 - link
Fret not! There are more on the way.Oh, so MANY more. ;)
geniekid - Thursday, May 26, 2011 - link
I just want to say I totally support your reviewing of cases, ESPECIALLY those that are designed to be quiet. This is an area of system building that is severely lacking in good information on the internet, second maybe to power supply testing (which you guys are also good at).After using my home built machine for the last 4 years, I've made up my mind that my next rig must be inaudible at idle and pretty quiet at load. It's gotten to the point where choosing the graphics card isn't just picking out the best card on the price/performance curve - it requires looking at noise at load. In that vein of thinking, I would like to suggest that you guys test GPUs that you've already tested just to generate some noise benchmarks for third party cooling solutions.
scott967a - Thursday, May 26, 2011 - link
I've also been looking at case reviews. Glad to see Anandtech might do more in this area. I had pretty much crossed off the H2 and this confirms it. Now looking at the Fractal Design R3, but most sites that review quiet (or quieter at least) cases aren't also looking at whether these quiet cases can handle an OC system. I'm looking at a Corsair H70 cooler so have to kind of guess how that radiator will work in these cases.Dustin Sklavos - Thursday, May 26, 2011 - link
We were supposed to get a Fractal Design R3 in house at one point but it didn't materialize and I haven't shaken their tree to get one sent in because I have such a backlog of other cases to review. ;)But I hear you about quiet, high performance cases because I'm in a similar boat. We have an Antec Sonata IV review that should be going up within the next month and then hopefully I'll be looking at SilverStone's Raven RV03 next month, too. Not going to lie, I'm pretty excited about that one.
Andreos - Thursday, May 26, 2011 - link
Suggest you guys update your photography skills and possibly equipment. Out-of-focus, motion-blurred, poorly exposed photos really don't do justice the content of your reviews, or the products being reviewed.tekeffect - Thursday, May 26, 2011 - link
I would like to see this some numbers for this with a liquid cooling setup...at least for the cpu.MMinNC - Tuesday, June 7, 2011 - link
Does anyone know if extra fans can be controlled by the integrated fan controller? This case has room for one 120mm fan at the bottom and one 140mm fan at the top.Thanks
kuzzia - Wednesday, June 8, 2011 - link
I'm almost positive that it can control an extra fan, bringing the total amount up to four.raytseng - Sunday, August 5, 2012 - link
if people still are looking at this article, apparently nzxt did make changes to H2 to address the concerns.I think they are stealth changes so no change in model number.
SilentPCReview was happier with an H2 build they received that had a later H2 over their initial review.
http://www.silentpcreview.com/article1274-page2.ht...